
Upload image to sharepoint.
Last year I needed to upload images to sharepoint from a react app. I found a lot of examples on how to do this using the old sharepoint API, but not for the new graph API. So I decided to write my own.
Create an app
To upload files to sharepoint using the new graph API you need to create an app in the Azure portal. This app will be used to authenticate the user and get an access token. This access token will be used to upload the file to sharepoint. Go to https://portal.azure.com/ and register a new app. You will need to add its Application (client) ID and Directory (tenant) ID to your .env file.
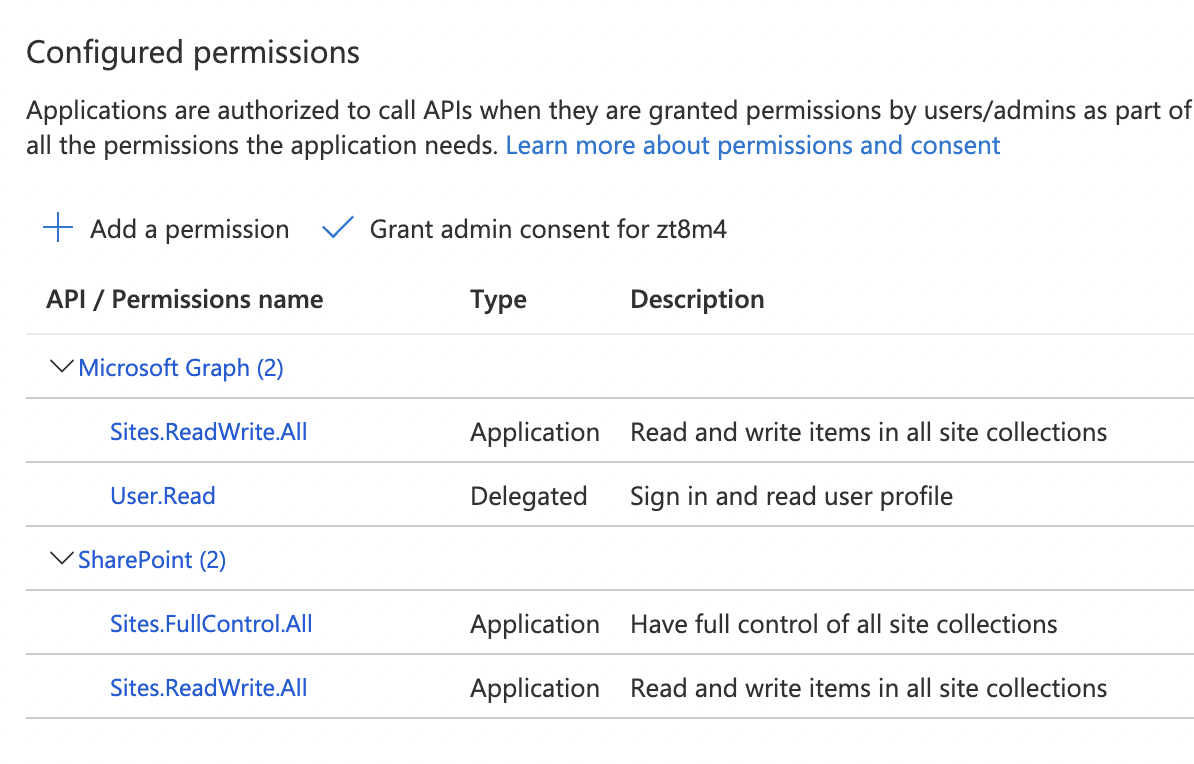
Next you will need to give the app the right permissions. Go to the app and click on API permissions. Add the following permissions: - Sites.ReadWrite.All - User.Read
Lastly you will need to create a client secret (found under Certificates & secrets) and add it to your .env file.
Upload image
Get your token
We start by creating a token using the app we created earlier. This token will be used to authenticate the user and give us access to the graph API.
export const getToken = async () => {
  try {
    const response = await fetch(
      "https://login.microsoftonline.com/" +
        process.env.TENANT_ID +
        "/oauth2/v2.0/token",
      {
        method: "POST",
        headers: {
          "Content-Type": "application/x-www-form-urlencoded",
        },
        body:
          "grant_type=client_credentials&client_id=" +
          process.env.CLIENT_ID +
          "&client_secret=" +
          process.env.CLIENT_SECRET +
          "&scope=https%3A%2F%2Fgraph.microsoft.com%2F.default",
      }
    );

    const data = await response.json();
    return data.access_token;
  } catch (error) {
    console.error(error);
  }
};
Create upload session
Small images (up to 5BM I beleave) can be uploaded directly to the sharepointAPI, but for bigger images we need to create an uploadsession.
We need to specify the path to the file we want to upload, the size of the file and the type of the file. The driveId can be found using the api to first get all sites and then get the driveId from the site we want to upload to.
You also specify the behavior when a file with the same name already exists. In this case we want to rename the file.
await fetch(
  "https://graph.microsoft.com/v1.0/drives/" +
    driveId +
    "/root:/" +
    folderName +
    "/" +
    fileName +
    ":/createUploadSession",
  {
    method: "POST",
    headers: {
      Authorization: "Bearer " + accessToken,
      "Content-Type": "application/json",
    },
    body: JSON.stringify({
      "@microsoft.graph.conflictBehavior": "rename",
      fileSize,
      name: fileName,
    }),
  }
);
Upload file
Files up to +/- 100MB can be uploaded in one go, but for bigger files we need to upload them in chunks.
We got the uploadUrl from the previous step. Now from the frontend we can upload the file in chunks. The size of the chunks can be made smaller to display a more accurate progress bar, but will make the overal upload slower.
const chunkSize = 30000000;

const chunks = Math.ceil(file.size / chunkSize);
let currentChunk = 0;
const uploadNextChunk = () => {
  const start = currentChunk * chunkSize;
  const end = Math.min(file.size, start + chunkSize);

  const chunk = file.slice(start, end);
  fetch(uploadUrl, {
    method: "PUT",
    headers: {
      "Content-Length": file.size.toString(),
      "Content-Range": "bytes " + start + "-" + (end - 1) + "/" + file.size,
    },
    body: chunk,
  })
    .then((res) => {
      if (!res.ok) {
        throw new Error("Upload failed");
      } else {
        return res.json();
      }
    })
    .then((y) => {
      currentChunk++;
      if (currentChunk < chunks) {
        console.log("NEXT");
        uploadNextChunk();
      } else {
        console.log("SUCCES");
      }
    })
    .catch((error) => {
      console.error(error);
    });
};
uploadNextChunk();